A beautifully stained deck can transform your outdoor space — but only if the stain actually adheres properly. Every year, homeowners waste hundreds of dollars on stain that peels, blotches, or fails within a single season because of preventable application mistakes. This guide walks you through the best way to apply deck stain in 2026, from surface preparation through final curing, so your hard work pays off for years.
Key Takeaways
- The best way to apply deck stain combines proper surface preparation (washing, brightening, light sanding) with the right weather window and tools matched to your skill level.
- Preparation accounts for 60–70% of your final results — more than the specific applicator you choose.
- Ideal staining conditions are 50–80°F, low humidity, a light breeze, and no direct midday sun on the deck surface.
- New pressure-treated lumber typically needs 6–9 months of drying before staining, while older decks may require more scraping and sanding.
- Applying thin, even coats while maintaining a wet edge prevents lap marks, blotches, and peeling.
Why Deck Stain Application Matters
Decks built in the last 10–15 years using cedar, redwood, or pressure-treated pine face significant risk from UV radiation and moisture damage if stain is applied incorrectly. Modern factory-treated lumber often contains water-repellent additives that demand specific weathering periods before staining — skip this, and you're looking at adhesion failures within months.
Deck stain protects your wood through a combination of penetrating oils, resins, and pigments that block UV rays, repel water, resist mold and mildew, and prevent mechanical checking or cracking. Application method directly affects how well these protective compounds penetrate and bond. That's the same reason our deck staining services place so much emphasis on prep and timing — they make or break the finish.
Common DIY mistakes and their consequences:
- Staining damp wood — blistering and peeling within one season.
- Applying stain too thick — sticky surface that never fully cures.
- Staining at midday or in direct sunlight — flash curing leads to a blotchy appearance and reduced longevity.
- Skipping cleaning — dirt and tannins block stain absorption.
Consider a deck built in 2018 in a four-season climate. Correctly applied semi-transparent stain with proper prep can last 3–4 years before restaining. The same deck stained carelessly might need complete stripping and reapplication after just 12–18 months.
This article covers weather timing, preparation, tools, and detailed application techniques in the order you'll actually do them.
Check Weather and Deck Readiness First
Timing is the fastest way to improve stain performance. Check conditions several days before any prep work begins — not the morning you plan to stain.
Ideal staining weather:
- Air temperature: 50–80°F (aim for ambient temperatures between 50°F and 90°F).
- Low to moderate humidity (40–70%).
- Light breeze (5–10 mph) for proper solvent evaporation.
- Full shade or filtered sun on the deck surface.
Your deck needs to be totally dry for at least three days before you start staining, and it should remain dry for 24 hours after applying the stain. After washing, allow 48–72 hours of drying time. For light cleaning a garden hose can be used, but a pressure washer is more effective for deep cleaning. Make sure no rain is expected for at least 24 to 48 hours after application to allow proper curing.
The water-drop readiness test: sprinkle water on several boards. If it sinks in within 30–60 seconds, the wood is ready. If water beads up, delay staining — the surface still contains too much moisture or residue. If your deck is in good shape, you may only need a light cleaning before staining.
Oil-based stains typically need 24–72 hours to cure fully, while many water-based formulas can be walk-dry in a few hours but still need a full day to reach working hardness. Avoid staining at midday or in direct sunlight to prevent flash curing. Work in the morning or late afternoon, following the shade as it moves across your deck.
Choose the Right Deck Stain Type and Color
The "best" stain depends on your deck's age, wood species, existing coatings, and how much grain you want visible. There's no universal answer — only what's right for your situation. For homeowners who want to dig deeper into how UV and moisture break down exterior wood over time, the USDA Forest Products Lab publishes excellent peer-reviewed research on wood weathering and finish performance.
Opacity levels explained:
- Clear / wood-toned: Maximum grain visibility, minimal UV protection (blocks <30% UV), lasts 6–12 months.
- Semi-transparent: Shows grain, good balance of protection (~70% UV block), ideal for new cedar / redwood.
- Semi-solid: More uniform color, hides about half the grain, excellent UV protection (~85%).
- Solid: Paint-like coverage, conceals texture completely, best for weathered wood or mismatched boards.
Older, beat-up decks with cupping, splitting, or mismatched boards often look best with semi-solid or solid stain to even out appearance and hide repairs. If your deck already has a solid or film-forming coating, you generally must stick with solid stain again unless you strip back to bare wood.
Color selection tips: Mid-tone browns and grays hide dirt better than very light or very dark shades. Test 2–3 sample colors on an inconspicuous board and let them dry 24 hours — stains typically darken 10–20% as they cure.
Never apply water-based stain over a glossy oil film. If you're switching systems, the old coating must be fully removed or heavily weathered and dull before proceeding.
Prepare the Deck Surface Properly
Here's the reality: 60–70% of your results come from preparation, not the applicator. Treat this section as a chronological checklist before you stain a deck.
Clear the space: Remove all furniture, plants, and decor from the deck before staining. Detach or tape off anything touching the wood — hanging lights, downspouts, decorative brackets — and inspect the surface fully.
Inspect thoroughly: Check for rotten or warped boards, loose fasteners, cracked planks, and splintering. Replace rotted or warped boards and reset any nails so they sit flush with or slightly below the surface — this prevents damage to your applicator and creates a smooth canvas for stain.
Sweep and vacuum: Remove leaves, debris, and loose dirt. Use a shop vac to clean gaps between deck boards and the junction where the deck meets the house.
Deep cleaning: Power washing is an effective method to clean a deck before staining because it removes dirt and grime that can affect adhesion. Use a specialized deck cleaner with a stiff-bristle brush or a pressure washer on a low setting. Keep a 25-degree fan tip at least 12 inches from the wood, moving constantly to avoid gouging.
After power washing, applying a deck cleaner and letting it sit for a few minutes can help remove set-in stains. For heavy mildew or gray weathered wood, follow with a wood brightener containing oxalic acid to restore proper pH.
Drying time: After cleaning, wood must dry thoroughly — usually 24–48 hours in warm conditions, longer in cool or damp weather.
Light sanding: Lightly sand the deck with 60- or 80-grit sandpaper to remove loose wood fibers and open the wood's pores for better absorption. An orbital sander makes this fast on flat boards; switch to hand sanding around railings and detail areas.
Final prep: Reset any nails or screws sitting proud of the surface, countersink if necessary, then vacuum or dust completely so no loose particles remain.
Special Prep Cases: New vs. Weathered vs. Pressure-Treated Decks
Different deck conditions require adjusted prep approaches. Here's what changes based on your situation.
Staining a New Deck (Under 1 Year Old)
Many new decks, especially those built since 2024 with kiln-dried lumber, still need time for mill glaze and surface treatments to weather off. This waxy layer prevents stain penetration.
For most non-pressure-treated cedar or redwood decks, a 2–3 month weathering period plus thorough cleaning and brightening is usually sufficient before the first stain.
Sanding is often minimal on new deck lumber — focus on end grain, handrails, and any ink stamps or manufacturing marks. Avoid thick film coats on your first application. One coat of penetrating stain allows remaining moisture to escape while still providing protection.
Staining a Beat-Up or Previously Coated Deck
Older decks (5–10+ years) with peeling stain or flaking paint require more aggressive prep, including scraping and possible chemical stripping. Use sharp paint scrapers and re-sharpen with a metal file every 10–15 minutes to reduce wrist strain and ensure efficient removal.
Heavily failed solid stain or paint may need a chemical stripper followed by thorough neutralizing and rinsing — always follow manufacturer safety instructions. Spot-sand bare and partially coated areas to feather edges, making the surface visually uniform before new stain.
For decks with multiple heavy paint layers, extensive rot, or structural concerns, consider professional deck restoration instead of fighting the problem alone — you'll save tools, time, and a sore back.
Staining Pressure-Treated Wood
Most pressure-treated decks built or replaced in 2025–2026 need approximately 6–9 months of exposure before staining. These boards are infused with ACQ or MCA copper preservatives and initially hold 28–35% moisture content — far too high for stain adhesion.
Staining pressure-treated wood too early causes poor adhesion, premature peeling, and uneven color because stain cannot penetrate properly. Even "new" pressure-treated boards need cleaning and light brightening before first application to remove manufacturing residues.
Use penetrating semi-transparent or semi-solid stains specifically designed for treated lumber. Apply thin coats, especially on first application — this allows remaining moisture to escape while the protective layer develops.
Pick the Right Tools for Applying Deck Stain
There's no single "best" tool. The optimal method combines a brush with another applicator (pad, roller, or sprayer) chosen to match deck size and your comfort level. Want a quick refresher on technique fundamentals before you start? Our roundup of deck staining tips walks through the small habits that separate a one-season finish from one that lasts years.
- Brushes: A natural-bristle brush is ideal for oil-based stains and for working stain deep into the wood fibers. Use 3–4 inch widths for cutting in edges, railings, and end grain. Quality synthetic bristles work best for water-based products.
- Rollers: Ideal for large, flat deck surfaces and provide quick, even coverage. Use a short-nap roller (1/4-inch) for smooth, newer wood and 3/8–1/2 inch nap for older, rougher boards. Rollers require back-brushing for proper penetration.
- Staining pads: Quick to use, offer even product distribution, and can reach small crevices on railings and between deck-board gaps. Pair with an extension pole to reduce back strain on large decks.
- Sprayers: An airless or HVLP sprayer is fastest for railings and spindles but demands careful masking and immediate back-brushing to avoid overspray stripes and drips. Practice on a scrap board first.
Before you begin: stage all tools — brushes, pads, roller frame with pole, rags, paint tray or bucket with grid, and drop cloths — before opening the stain. This keeps you in continuous, wet-edge motion without scrambling for supplies.
Best Technique for Railings and Vertical Surfaces
Begin with vertical surfaces like handrails and posts before moving to floorboards. Any drips that fall will land on unstained boards you'll cover later.
Work in small sections — one rail bay between posts at a time — to keep a wet edge and maintain consistent color from top rail through spindles to bottom rail.
Use a combination of garden sprayer (for speed) and brush (for control), or just a brush for smaller decks. Always finish with smooth strokes following the direction of the wood grain.
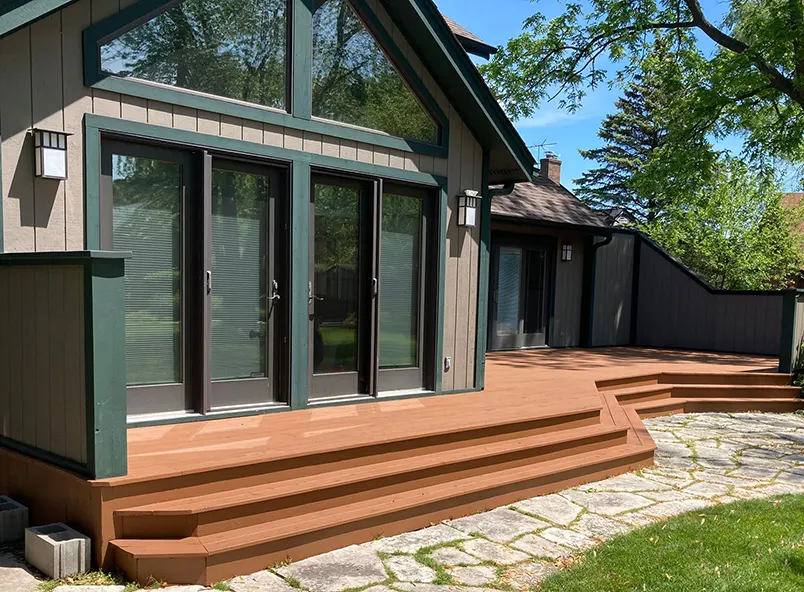
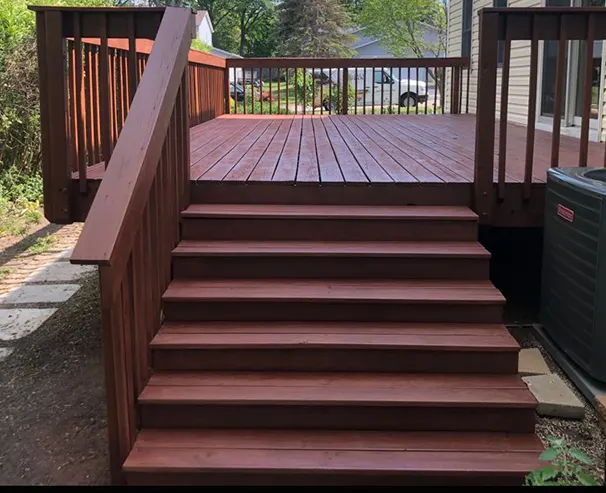
Coat the tops of railings and exposed end grain thoroughly — these areas see the most sun and water exposure. Fully sealed end grain greatly reduces splitting from freeze-thaw cycles.
Wipe or brush out drips and runs immediately. Work top-down, checking sides of spindles from multiple angles in good light. Use painter's tape to protect siding and trim when spraying near the house, glass doors, or metal hardware. Clean any splatters with a damp rag while still wet.
Best Technique for Floor Boards
This is the core application section — follow these steps for staining your deck floor systematically. The University of Minnesota Extension publishes a great primer on exterior staining best practices that complements the steps below if you'd like a second authoritative reference.
Start strategically: Begin at the house and work outward toward stairs or your exit. This prevents painting yourself into a corner and avoids stepping on wet stain.
Cut in first: Use a brush along the house, posts, and tight corners before switching to a stain pad or roller for the field boards.
The 3–4 board rule: Apply stain along the full length of 3–4 deck boards at a time, keeping the leading edge wet so new stain blends seamlessly into the previous section. To avoid lap marks, brush wet stain into wet stain.
Thin, even coats: Stain should soak into the wood, not sit as a thick glossy film. Over-application leads to a sticky surface and eventual peeling. Let excess stain soak in naturally rather than building up heavy layers.
Work along the grain: Follow board direction with long, smooth strokes for a uniform appearance. Using a roller helps stain spread evenly across the surface, while a wide-bristle brush after the roller pushes the stain into the wood's pores. Rollers for large areas plus brushes for edges and tight spaces is the combination most pros rely on.
Second coat considerations: Many penetrating deck stains call for one coat on new or dense wood, while weathered, porous decks may benefit from a light second coat applied within the manufacturer's recoat window (often 1–4 hours). Apply before the first coat fully cures to ensure proper bonding.
Inspect as you go: Check in raking light (low-angle sunlight or work light) to catch holidays (missed spots), puddles, or lap marks while the stain is still workable. Even coverage matters more than speed.
Drying, Curing, and Early-Stage Care
Understanding the difference between "dry to touch," "ready for light traffic," and "fully cured" prevents many common post-staining problems.
Typical timelines:
| Stain Type | Dry to Touch | Light Foot Traffic | Full Cure |
|---|---|---|---|
| Water-based | 1–2 hours | 4–6 hours | 24–72 hours |
| Oil-based | 4–24 hours | 12–24 hours | Up to 72 hours |
Wait 24–48 hours before walking on the deck and 72 hours before replacing heavy furniture. Once the stain has fully cured, applying a clear topcoat as part of routine deck sealing can further enhance durability and weather resistance — particularly on horizontal surfaces that see the most sun and foot traffic.
Keep pets, furniture, and planters off until full cure. Heavy items placed too soon leave permanent marks or cause adhesion issues.
If light drizzle hits within a couple of hours, let the deck dry completely before evaluating. Light spotting may require gentle sanding and touch-up once conditions improve.
Safety note: Dispose of oily rags properly — spread flat outdoors to dry or store in a metal container filled with clean water and sealed. Linseed oil oxidation can generate enough heat (up to 500°F) for spontaneous combustion. Store leftover stain tightly sealed for future touch-ups.
Ongoing Maintenance to Keep Your Deck Looking Fresh
The best way to apply deck stain includes planning for maintenance, not just the initial job. A little annual attention dramatically extends time between full re-staining projects.
Annual spring routine:
- Light wash with deck cleaner or mild detergent.
- Gentle brushing of the deck floor.
- Inspection of high-traffic and sun-exposed areas for wear.
- Spot touch-ups where needed.
To maintain your deck stain, reapply it periodically. A good rule of thumb: check whether the stain still repels water. Perform a simple water-bead test each year — if water soaks in immediately and the color looks faded on horizontal surfaces, it's time to clean and restain.
Expected lifespans:
- Semi-transparent stains on sunny, high-traffic decks: 2–3 years.
- Semi-solid and solid stains with proper prep: 3–5 years.
Most semi-transparent stains only require a quick pressure wash and reapplication, while opaque stains may need more frequent maintenance because they tend to crack rather than fade gracefully.
Keep grills, planters, and mats slightly elevated or periodically move them to prevent trapped moisture and uneven wear spots. Document your stain brand, color name, batch number, and application date so future maintenance coats match within acceptable color variance.
Frequently Asked Questions
These questions address practical concerns not fully covered in the main sections.
Can I stain over an old deck stain without stripping it first?
You can usually apply a similar or darker semi-transparent, semi-solid, or solid stain over a previous penetrating stain if the old coating isn't peeling and the surface is thoroughly cleaned and dull. The key is compatibility — penetrating stains can layer over each other when properly prepared.
If the old stain is flaking, glossy, or heavily built up, at least partial stripping and sanding is required for reliable adhesion of the new coat. Always perform a small test patch after cleaning to see how well the new stain bonds and looks over the existing coating before committing to the entire deck.
What's the best way to apply deck stain on composite decking?
Most modern capped composite deck boards (common since about 2015) aren't designed to accept traditional wood stains and usually shouldn't be stained at all. The capping layer prevents penetration.
Some older, uncapped composites can accept specialized coatings made specifically for composite surfaces. Check the board manufacturer's 2026 guidance before applying any product. If coating is permitted, use only products explicitly labeled for that composite brand and begin with thorough cleaning using recommended cleaners.
Is it better to spray or roll deck stain?
Sprayers are faster, especially for railings and large projects, but always require back-brushing or back-rolling to work the stain into the wood. Speed without penetration means poor protection.
Rollers and pads are easier for beginners to control, create less mess, and often represent the safest approach for first-time DIYers when combined with a brush. Natural-bristle brushes are recommended for working stain into the wood fibers, while rollers shine for quick, even coverage on large flat surfaces.
The hybrid approach works best: spray railings and spindles then back-brush, and use a pad or roller plus brush for deck boards.
How long should I wait between coats of deck stain?
Always follow label instructions for your specific product — recoat windows vary widely between brands and between oil- and water-based formulas. Generic advice doesn't account for formula differences.
Typical ranges: many water-based stains allow a second coat after 1–4 hours once the first is dry but not fully cured. Many oil-based products either call for a single coat or a light second coat within a similar window.
Waiting too long between coats (beyond the recommended window) prevents proper bonding, leading to poor adhesion and peeling. Timing matters more than many people realize.
What if I already stained my deck and it looks blotchy?
Mild blotchiness can sometimes be improved by applying a thin, carefully blended additional coat over the lighter areas, taking care not to create a thick film. Work the new stain into problem spots while maintaining a smooth finish.
Severe lap marks and dark, shiny patches from over-application may require letting the deck cure fully, then selectively sanding problem spots and restaining those boards. For large or badly blotchy decks, it may be more efficient to strip or sand the worst 20% of areas and start over in the correct weather window using thin, even coats and strict wet-edge technique.
If the project feels bigger than you bargained for, you can always request a free estimate — a quick site visit often saves homeowners far more than they'd spend on materials for a full re-do.
Before staining your deck next time, ensure the wood is dry and free of contaminants, as damp surfaces can cause the stain to crack or peel — prevention beats correction every time.